- Mar 18, 2024
Sliding Tail Vise
- Norman Pirollo
Over time and with increased use of hand tools, I enjoy creating jigs and tools to make the experience a better one. As a left-handed woodworker, I struggle with tools that are primarily designed for right-handed use. Regular bench planes are not an issue as they are symmetric in nature. When it comes to joinery and specialized hand planes however, the handedness is a little more critical. I have adapted for the most part but in some cases prefer a left-handed version of a tool as it feels more natural to me. In summary, I need to work on both sides of a workbench to accommodate either a left-handed or right-handed tool.

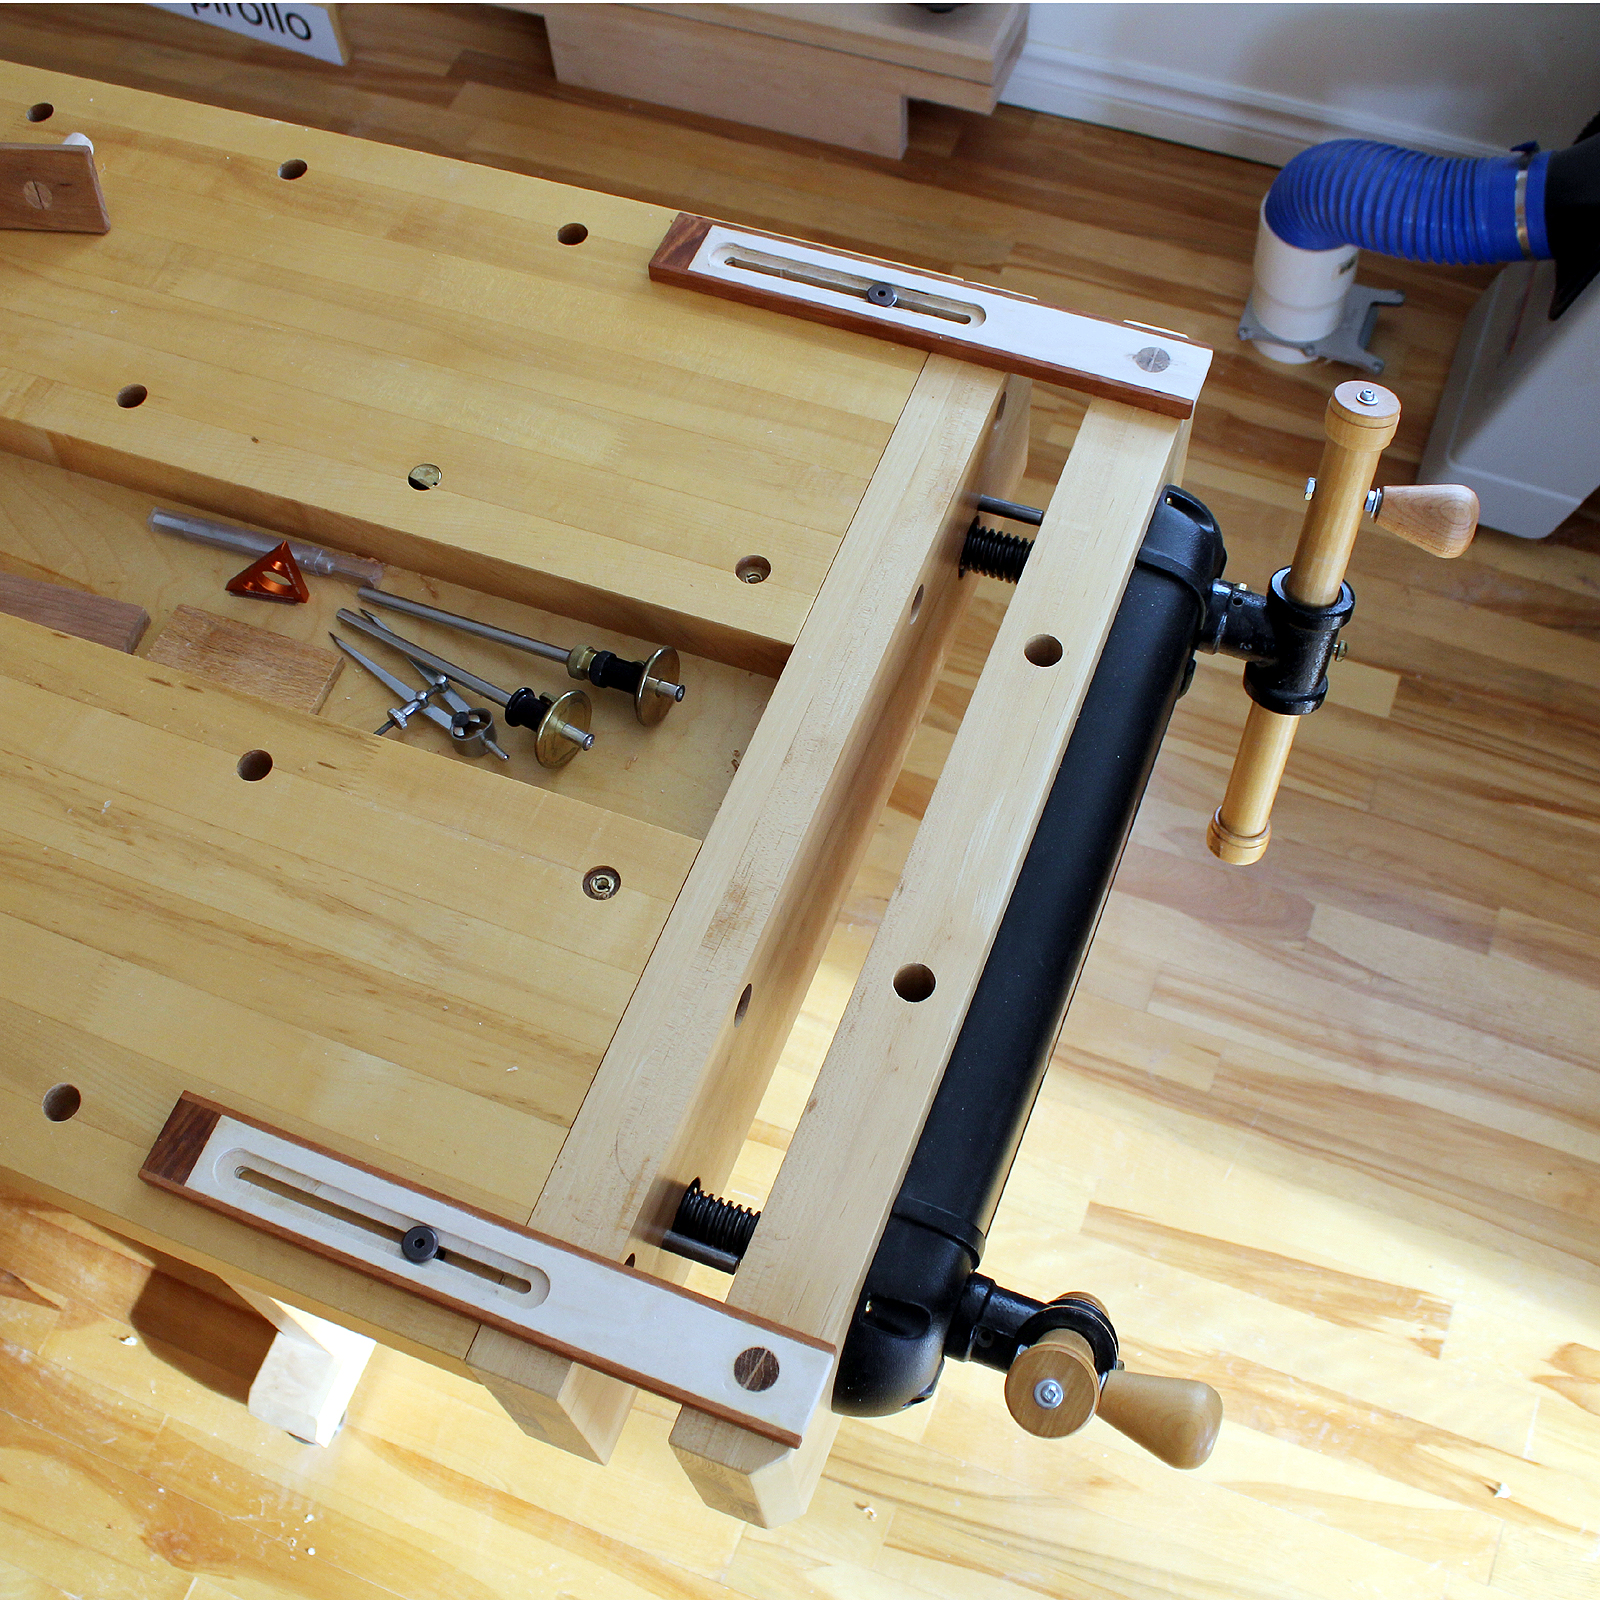
To overcome this, I developed this interesting workholding jig that plugs into the tail vise, in my case a twin screw vise, and serves to extend the operation of the vise over the workbench surface. Twin screw vises or end vises when used as tail vises, introduce a large gap between the moving jaw and the workbench surface. Another consequence is that the workpiece is hanging over the end of the workbench, not an ideal orientation for working with hand planes. The sliding tail vise emulates a real tail vise in its operation. Racking is also eliminated when clamping narrow boards through the four point system.

The sliding tail vise transfers clamping to the main workbench top. Inherent in its design ,it attaches through four points. Two fixed points in the outer jaw and two sliding points within slots. I can now quickly clamp a workpiece to the workbench surface through a wide bearing surface and if necessary lock it in place through two knurled bolts.

The sliding tail vise is also designed to be portable. I can easily use it on either side of my workbenches depending on the tool being used ( left or right hand orientation). I have also updated the design to work better with plow planes and the depth adjuster on this type of hand plane. This is seen in the last image. So what began as a project to use the twin-screw vise to clamp on either side of a workbench, turned out to be a really versatile clamping aid for an end vise or twin-screw vise regardless if you are left or right-handed.

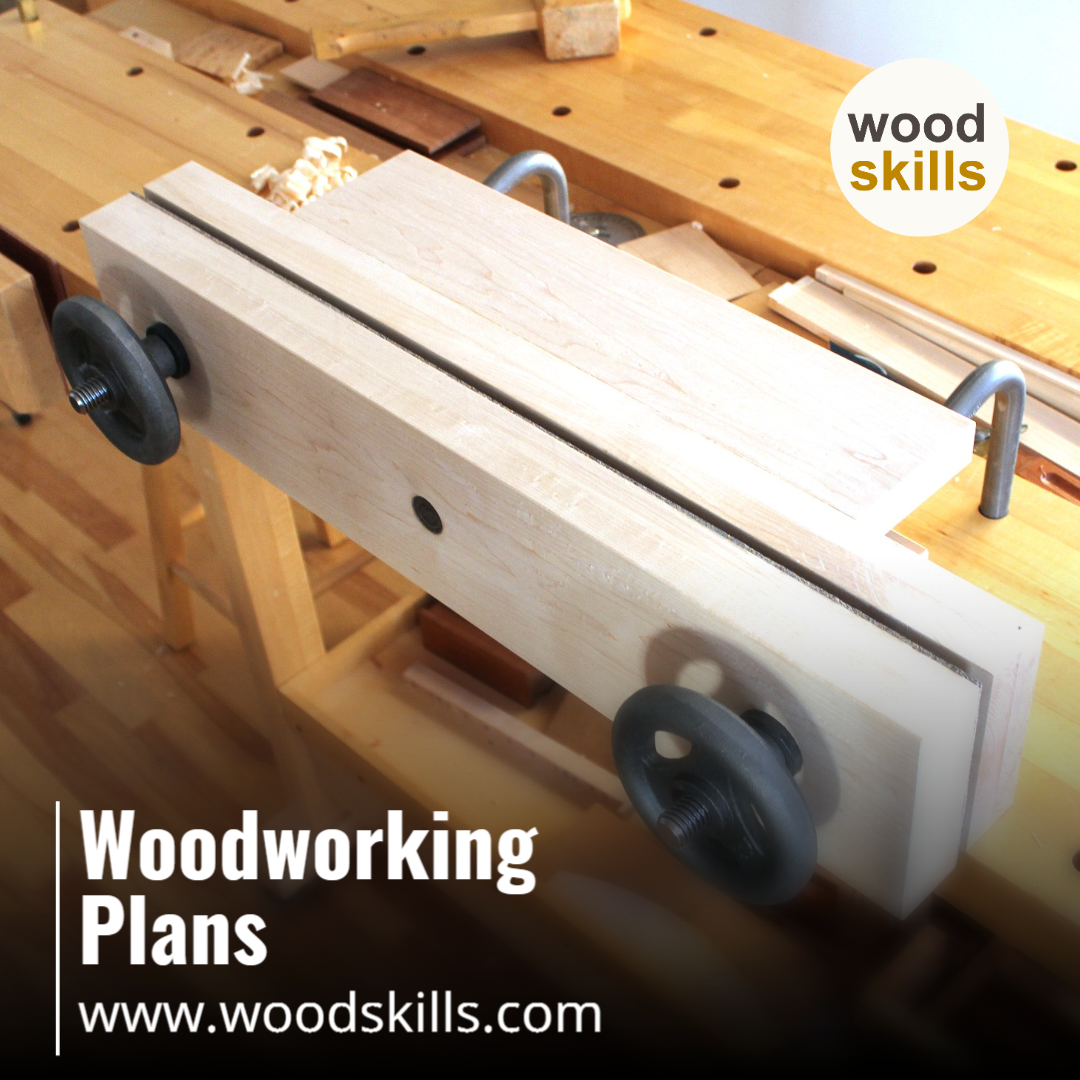
An updated version has a narrower profile and uses a single dog hole on the end vise jaw. These are straightforward to make and a tail vise can be installed on each side of the workbench. Having a sliding tail vise mounted on each side enables me to use both a left-handed or right-handed specialized plane without contorting myself.
Diagrams and a detailed step-by-step plan have been developed on building both versions of this sliding tail vise. The plans are not specific to Veritas workbenches and can be easily adapted to similar workbenches with either an end vise or twin screw vise. The hardware is widely available with a very low investment in wood! Sliding Tail Vise Plan now available with link below.
WoodSkills Courses + Plans
- $40
Hand Tool Case
- Course
- 16 Lessons
- Includes 1 additional product
- $50
Tea Cabinet Course
- Course
- 56 Lessons
- Includes 1 additional product
- $40
Woodworking Course
- Course
- 55 Lessons
- Includes 1 additional product
- $40
Furniture Design Course
- Course
- 26 Lessons
- Includes 1 additional product
- $40
Kumiko: Learn Japanese Woodworking
- Course
- 23 Lessons
- Includes 1 additional product
- $40
Hand Tool Class
- Course
- 48 Lessons
- Includes 2 additional products